Learning to see creatively, and learning to compose a shot (Composition Tips), takes much more
than learning camera buttons, dials, and controls. This assignment forces you to look
around you, to really see what you’re shooting and try to make interesting images.
than learning camera buttons, dials, and controls. This assignment forces you to look
around you, to really see what you’re shooting and try to make interesting images.
Advanced Photography
Shooting Assignment 1: The 15 Foot Circle
PART 1
Select three different spaces that you have a connection to or find interesting for this assignment. Outdoors could also work, but make sure you are close to a variety of subjects. Stand in the middle of the room or space and set your timer on your phone for 5 mintues and take as many photos that you can in that time. Observe the space from a far and take shots, but also begin to look closer and get more details.
Take photographs only of subjects that happen to be within 15 feet (or 10, or 5) of where you’re standing. Give yourself a time limit of 5 minutes. Exhaust all possibilities. (You should be able to easily get more than 30 images.) Get as many images as you can using only that area before moving on to a second location. In the second location, do the same thing as the first. Take shots within 15 feet (or 10, or 5) of where you’re standing. Then, go on to a third location. This kind of exercise forces you to really look at things and work to compose interesting images. We should really get a sense of the overall space, along with details of things that exist within this space. The resulting images should feel like they tell a story about the space.
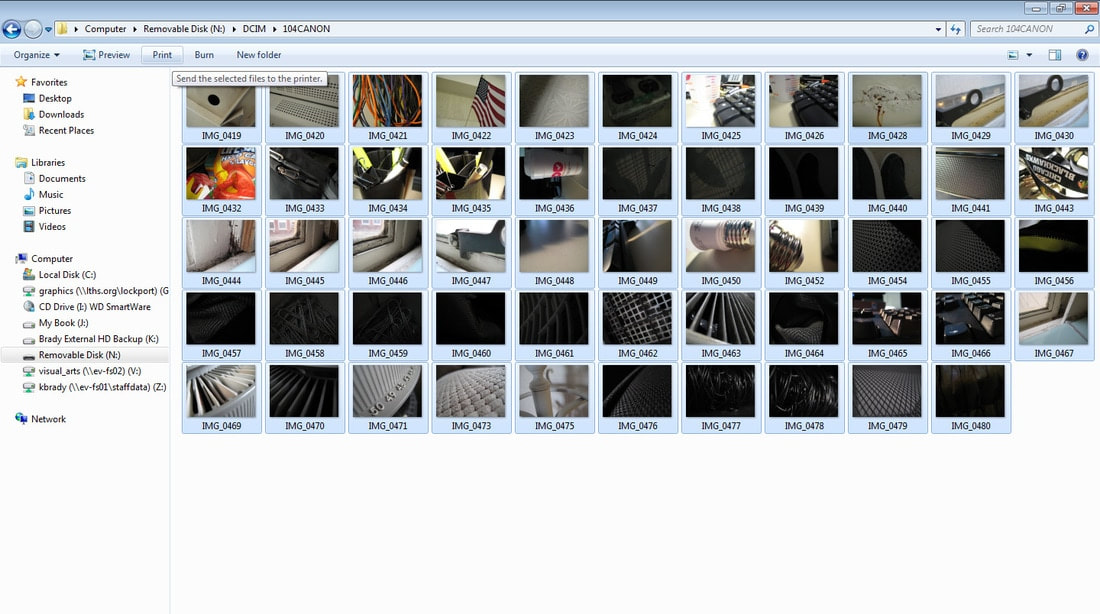
Download all images to a specific folder on your computer. Steps to complete this can be found here.
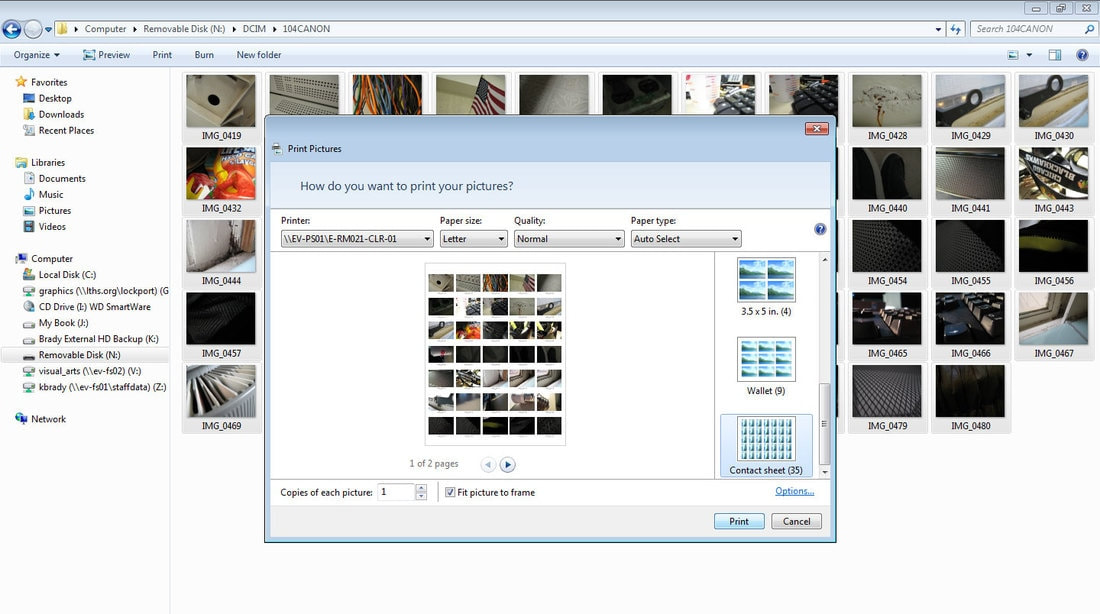
Print a Contact Sheet following the instructions here of all your photos for this assignment. Circle the best 8 photos total. Bring this contact sheet to me for review.
Shooting Assignment 1: The 15 Foot Circle
PART 1
Select three different spaces that you have a connection to or find interesting for this assignment. Outdoors could also work, but make sure you are close to a variety of subjects. Stand in the middle of the room or space and set your timer on your phone for 5 mintues and take as many photos that you can in that time. Observe the space from a far and take shots, but also begin to look closer and get more details.
Take photographs only of subjects that happen to be within 15 feet (or 10, or 5) of where you’re standing. Give yourself a time limit of 5 minutes. Exhaust all possibilities. (You should be able to easily get more than 30 images.) Get as many images as you can using only that area before moving on to a second location. In the second location, do the same thing as the first. Take shots within 15 feet (or 10, or 5) of where you’re standing. Then, go on to a third location. This kind of exercise forces you to really look at things and work to compose interesting images. We should really get a sense of the overall space, along with details of things that exist within this space. The resulting images should feel like they tell a story about the space.
Download all images to a specific folder on your computer. Steps to complete this can be found here.
Print a Contact Sheet following the instructions here of all your photos for this assignment. Circle the best 8 photos total. Bring this contact sheet to me for review.
PART 2
After I review these chosen photos, I will give your contact sheet back with editing instructions. I will star some images that I would like you to edit and include in your collage but allow for you to make some selections as well.
PART 3
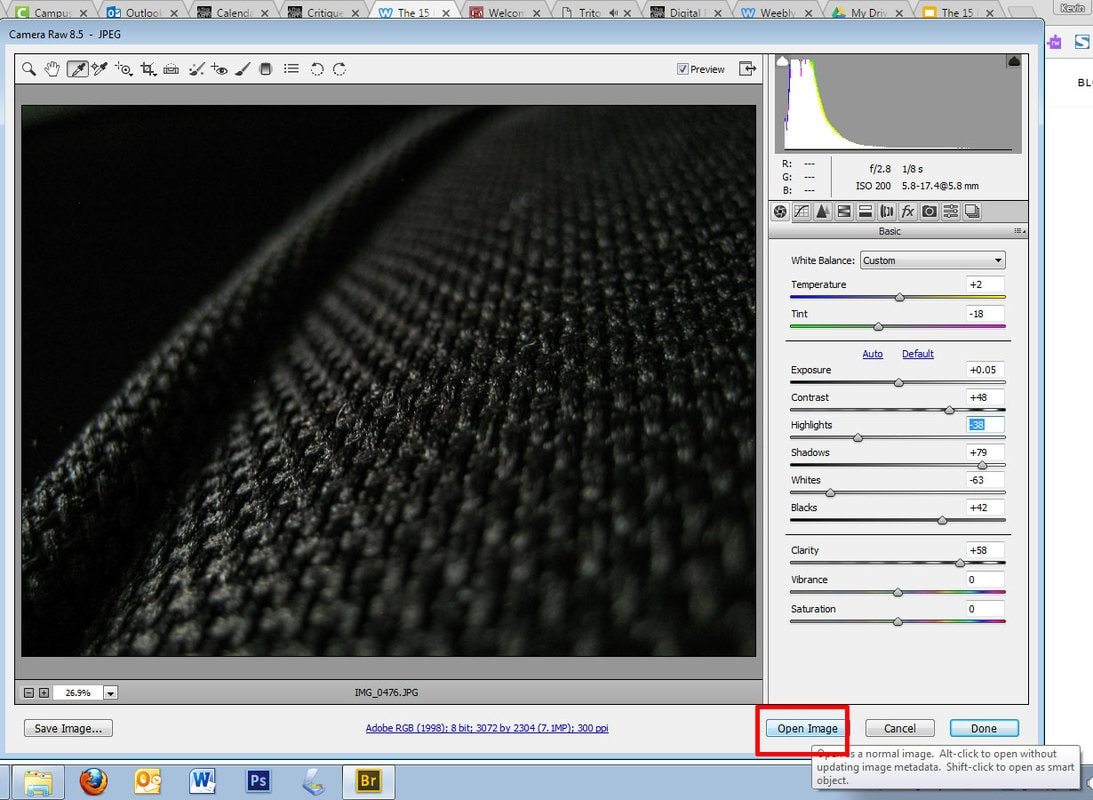
Edit these photos using the Adobe Camera RAW editor.
Complete the 6 Point editing steps for each photo.
Press Open button to open the photo in Adobe Photoshop
After I review these chosen photos, I will give your contact sheet back with editing instructions. I will star some images that I would like you to edit and include in your collage but allow for you to make some selections as well.
PART 3
Edit these photos using the Adobe Camera RAW editor.
Complete the 6 Point editing steps for each photo.
Press Open button to open the photo in Adobe Photoshop
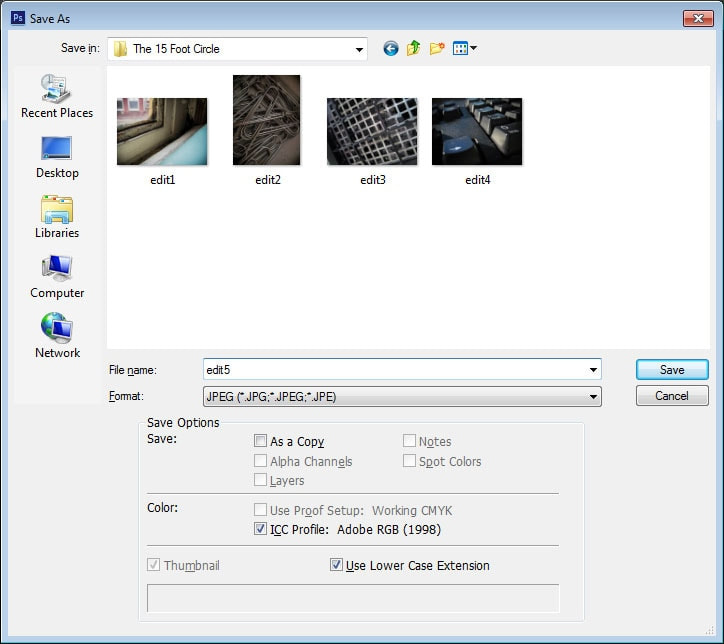
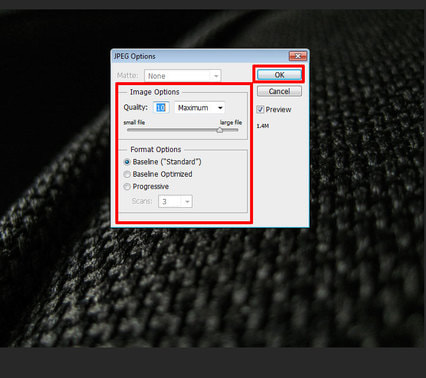
File Save AS > Save as Edit 1, Edit 2, etc. > Desktop > Camera Downloads > The 15 Foot Circle folder
Make sure to save each one with DIFFERENT NAMES (Edit 1, Edit 2, etc.) than the original images. The original photos will be in this folder already.
Make sure to save each one with DIFFERENT NAMES (Edit 1, Edit 2, etc.) than the original images. The original photos will be in this folder already.
PART 4
Create a Google Slides presentation of your 1st original unedited photo, followed by the edited version. Continue the slides for the remaining unedited and edited photos. You must edit 15 total photos.
When you are finished create a PicMonkey collage of 10-15 of your edited photos and turn in to the correct folder.
